Week 3 (14/04/2022) - Week 9 (26/05/2022)
Faith Aimee Choong Jia Yi / 0345509
Fashion Project 1 [DST64304]
Task 02: Innovate Design Ideas (Prototyping)
LECTURE [14/04]
On Monday, Ms Maria told us to prepare or safely keep some Zero Waste pattern drafting ideas or techniques so that we can try them out either onto the mannequin or the mini-size doll. We were told to bring Calico fabric, drafting tools, paper, sewing essentials, and colors (markers, colored pencils).
She gave us a website that Holly McQuinn, a pioneer of Zero Waste, created so that other designers are able to utilize the Zero Waste concept in fashion. https://makeuse.nz/make/
MENTORSHIP: NAJAH ONN [14/04]
Today's topic was the Sustainability Meter.
About 80 billion clothes are made in a year but 30% of them end up not being sold to consumers. This leads to 12.8 million tons of clothing being sent to landfills manually with 1.2 billion tons of gas emissions from factories (when making clothing).
The sustainable meter is created to help in reducing textile/fabric wastage (ending up in landfills). Najah explains the three criteria for the sustainable meter.
1. MATERIALS & COMPOSITION
Comparing materials to see how sustainable they are in terms of their being able to be recycled and reused again. Reduces factory emissions, and wastage, and increases renewable materials.
2. INNOVATION CIRCULARITY
There are three different categories of how clothing is recycled and reused again.
a. Linear Economy= Raw materials are use to make clothing directly and once made are disposed.
b. Recycling Economy= Textiles/fabrics are being recycled so it reduces less disposure.
c. Circular Economy= Garments are being recycled and reused again following a circular cycle that doesn't dispose much waste.
Circular Apparel Business
In terms of reducing textile/fabric waste, through business, there is a procedure to solve the wastage problem. A design idea must be made to drive waste out. The problem must be taken into account and this is the problem-solving stage. Usage of technologies and textile engineers to aid us in making biodegradable garments that are regenerative and biodegradable. Workers should be paid fairly in terms of their creativity, tech, and environmental conditions.
3. HERITAGE & CULTURE
Involving culture or heritage in your design. Back in our ancestor's time (more towards Asia), Zero Waste Fashion was actually used in making traditional clothing. We can utilize or get inspired by the techniques and methods they use. Since heritage and culture is presented as old fashion to the youth they tend to neglect the traditional wear which leads to wastage, we could try to include culture into our design so that there won't be a waste of the traditional garment and also by protecting and cultivating our ancestor's traditions.
ASSIGNMENT 02
To develop ideas through utilizing the garment draping technique to experiment and achieve a Zero Waste Pattern Making. We are to explore and innovate ideas to design our prototype.
DRAPING DESIGN PROCESS
I decided to make unisex designs, but the concept wasn't clear in my vision yet so I decided to experiment. With the website link, Ms Maria sent, I was interested in Long Coats, T-Shirt, and Wrap Dress. I decided to go with Long Coat first and analyzed the Zero Waste pattern design.
DESIGN 1 [Menswear]
I used mahjong paper first because I didn't want to start cutting my Calico fabric in case I made a mistake. I started by measuring the shoulder length, neckline to mid-chest length, and the length of the coat. I decided to try this piece on the man mannequin. I snip the opening of the neckline and fitted the piece inside. Since I was using paper, the structure is more rigid rather flowy like the Calico fabric. I decided to fold the remaining pieces of paper beneath the armhole to create this broad shoulder silhouette which represents bold, warrior-like. The front part was shorter than the back, so I devise this garment design to be cropped at the chest area. For this design, I wanted to make a two-piece garment.
TOP PIECE
INSPIRATION
After viewing the silhouette, I notice the resemblances of Japanese samurai to the garment design because of the broad shoulder structure.
 |
Figure 1.0
https://stlbujinkan.com/img/Samurai2.png |
For the bottom piece, I wanted to make it a Japanese style of pants with a few adjustments. I didn't make many changes for the back because the top has a waistcoat-like covering the bum area. So I thought of not including any ruffles or pleats because it would be covered.
INSPIRATION
I was inspired by Hakama. Hakama is a skirt-like pant that is used for the Japanese martial art 'Aikido'. It is also a type of traditional samurai pants. I wanted the inspiration for both the top and bottom to be similar so that they share a connection and resemblance.
 |
Figure 1.1
https://s3-ap-northeast-1.amazonaws.com/bhive-jp/media/yabai/article/2193/shutterstock_387325321.jpg |
BOTTOM
 |
| Back |
 |
| Front |
 |
| Side |
TWO-PIECE GARMENT
DESIGN 2 [Womenswear]
I found the Zero Waste pattern drafting for the kimono interesting. I found some references online to experiment with the structure of the mannequin.
 |
Figure 1.1
https://64.media.tumblr.com/85823829a393e98d3833964cadbdfdea/c7f3f282c9ae6280-c3/s640x960/9d57a14d938ee82a333054d1eb00fc0b5bbda441.png |
Figure 1.1 was the easiest to follow and understand how the pattern folds into the garment. As soon as I made the kimono pattern drafting, I snip the neckline so that it could fit into the mannequin. I thought of making this design a two-piece garment so I decided to add a layer of Calico fabric starting from the center.
 |
Front [Female Mannequin]
|
 |
| Side [Female Mannequin] |
 |
| Back [Female Mannequin] |
Mr JR made changes to my 'design 2' by shifting the back kimono pattern to the front and adding a piece of paper to the back so that it's balanced. He added ruffles to the design so that it becomes a dress with a round-back reveal. As for the kimono sleeves, he gave me an option on whether to keep them or cut through them. I decided to try that method so that I can compare the two of them (to see which is better).
KIMONO SLEEVES UNCUT
 |
| Front |
 |
| Side |
 |
| Back |
KIMONO SLEEVES CUT THROUGH
I preferred the kimono sleeves to be uncut as it gives a rigid and more sturdy silhouette.
DESIGN 3 [Womenswear]
I started with the kimono pattern once again but this time with even long sleeves. I wanted to try Julian Robert's subtraction technique [Zero Waste] by making holes at random places at the sleeves and later using leftover elastic straps to shape the sleeves into random ruffles. I thought that using mahjong paper was a bad idea to shape the sleeves because it could easily tear apart however it really gives the garment a good shape and form. I decided to keep the front bodice firm and straight like a fitted corset. I made darts at the front and back. When looking at the front darts I was reminded of the corsets back in the 16th century.
SIMILARITY
Maria Christina, Archduchess of Austria wore an inverted triangular corset with her bodice tip pointed downwards to her crotch or hip length.
 |
Figure 1.2
https://1tq45j21k9qr27g1703pgsja-wpengine.netdna-ssl.com/wp-content/uploads/2017/08/women01-8.jpg |
TOP
 |
| Side [Left] |
 |
| Side [Right] |
 |
| Back |
 |
| Front |
I thought of making the back longer so that it forms a coat. And instead of putting the inverted triangular shape at the front, I decided to put it at the back. As for the ruffles, they are only shown in the front.
COAT
.jpeg) |
| Back |
 |
| Side |
 |
| Front |
I preferred this silhouette rather than the top idea because it makes it look majestic. For the bottoms, I did a mix and match among my collection. I chose bottom design #8 because it made the silhouette more majestic looking. I made the coat cape shorter at the back because I want to show the ruffle design on bottom design #8.
BOTTOM
The same bottom design as #8
FULL LOOK
DESIGN 4 [Menswear]For this design, I decided to go with a coat design for the men's top wear. I decided to alter the jacket with both Japanese and Western influences. Below are my inspiration/influences from both sides. I'm still deciding whether to tie the remaining fabric at the back or let the fabric hang loose revealing an open back.
 |
| Open-Back |
INSPIRATION
This is a Haori. They are usually worn over the kimono, like a jacket. A Haori is said to be the men's version of a kimono. In the past, Haori was worn to protect men from the cold in battle. In the modern era, Haori is seen as a unisex garment that can be worn by both women and men as a casual yet traditional jacket.
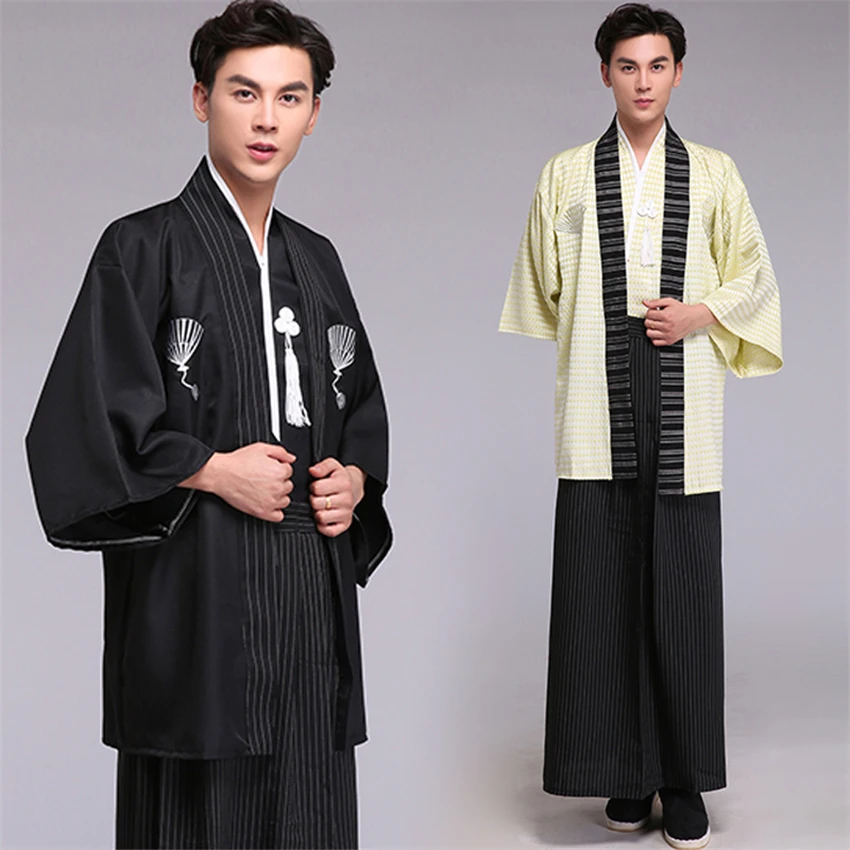 |
Figure 1.3
https://ae01.alicdn.com/kf/Ha2558748e48c419d843803aac252c2d41/Samurai-Traditional-Japanese-Kimono-Clothing-for-Men-Embroidery-Long-Sleeve-Stage-Performance-Retro-Asian-Coat-Ancient.jpg_Q90.jpg_.webp |
In the Victorian Era, men wore a variety of coats and one of the coats was the tailcoat. A tailcoat has a split end at the back that reaches the calf or knee-length.
 |
Figure 1.4
https://i.ebayimg.com/images/g/YagAAOSwIQdZJfsV/s-l400.jpg |
TOP [I didn't have a male mannequin with me at the moment]
 |
| Back |
 |
| Front |
 |
| Side |
BOTTOM
The pants will be the same design as design #7.
DESIGN 5 [Womenswear]
I decided to go with a dress design. For this design, I folded and pinch the fabrics together to make the texture of the dress. This is a fitted tube dress with asymmetrical ruffled sleeves. Previously Ms Maria asked me to try out asymmetrical designs as my designs tend to be quite balanced and symmetrical. Utilizing the subtraction technique for the upper part of the sleeves to make the ruffles. Leaving one side of the sleeve to be half-ruffled (shorter) whilst the other part is a quarter-ruffled (longer). I like the idea of the elastic bands dangling out of the sleeves.
DRESS
 |
| Back |
 |
| Front |
 |
| Side |
CROPPED COAT SLEEVE
DESIGN 6 [Menswear]
FULL LOOK
DESIGN 7 [Womenswear]
I started off the top with a Haori-inspired design using shorter sleeves instead of the long kimono ones. I decided to experiment with more asymmetrical designs so I made one sleeve shorter whilst the other is longer. I also utilize the subtraction technique at the back of the long sleeve while also making texture by pinching the fabrics together at the front.
TOP
 |
| Back |
 |
| Front |
 |
| Side [Right] |
 |
| Side [Left] |
INSPIRATION
This is a menswear kimono back in the Edo Period. Figure 1.5 shows a man in 'kamishimo' and 'nagabakama'. A 'kamishimo' is a Japanese sleeveless short jacket that is very wide at the shoulders and it folds at the waist. This is part of the traditional costume of 'Samurai's. A 'nagabakama' is long trousers that are somewhat similar to a 'hakama'. The long trousers kept men from moving too quickly. There are a variety of films and dramas that paints a hot-tempered man being tamed quietly by his companion just by stepping on his 'nagabakama' leg.
 |
Figure 1.5
|
I decided to make it a long skort with the skirt pattern being in the front whilst the back shows the pants pattern.
BOTTOM
DESIGN 8 [Womenswear]
TOP
The top will be the same design as design #4.
BOTTOM
I really like the pleated skirt design in design #7 so I took that piece and apply it as the front piece. I wanted to make a gown like a skirt following the Elizabethan era. I added an extra piece of cloth to the back and utilise the subtraction technique for the lower part of the gown skirt. I notice a U -shape is formed at the hemline of the skirt at the back.
FULL LOOK
DESIGN 9 [Menswear]
This design will be a mix & match of tops and bottoms in this collection.
TOP
The top will be the same design as design #7.
BOTTOM
The pants will be the same design as design #1.
DESIGN 10 [Menswear]
Similar to Design #4 coat design however this top is shorter (waist-length). I derived this top idea while thinking of different methods to form a Zero Waste Pants. The back has a triangular opening whilst the neckline is more stiffed at the back of the neck and smoother in the front.
TOP
BOTTOM
The pants will be the same design as design #7
LINE-UP OF 10 DESIGNS
Womenswear
Menswear
CHOSEN DESIGNS
For the Zero Waste project, we are to have 3 full look designs. I had a feedback session with Ms Maria and Mr JR to decide which designs will be showcased on the Runway and also on ShopMayamode.
The final 3 designs for the Zero Waste Project are Designs #3, 2, and 9. There will be 2 womenswear looks and 1 menswear/unisex look. Design #3 top pieces and 9 top pieces will be shown on ShopMayamode.
JR ADVICE: ShopMayamode simplified
FEEDBACK
By: Mr JR
"Instead of using the subtraction technique to make the puffed or structured shoulder effect. Making it efficient for consumers by adding drawstrings so that they can adjust the stiffness of the sleeve and also to the waist whether making it looser or tighter."
.jpeg) |
| Design #3 [Top Piece] |
JR ADVICE: ShopMayamode simplified
FEEDBACK
By: Mr JR
"Ruffled effect at the back, not going to be done. Armhole adjustment to be made at the front so that consumer finds it easier. Sleeves hemline sewed bottom so that there is double sleeves, one through the armhole whilst the other is through the long cloth making the arms into a T-shape."
.jpeg) |
| Design #7 [Unisex Top Piece] |
SHOPMAYAMODE FINAL OUTCOME
Here is my sample piece to be sent to the manufacture.
TOP DESIGN #03
.png)


.jpeg)


.jpeg)


.jpeg)
.jpeg)


.jpeg)


.jpeg)
.jpeg)


Comments
Post a Comment